Showing posts with label St. Patricks Day. Show all posts

3.16.2011

Paper Plate Leprechaun

Two of the cutest little red-bearded men I've ever seen! This Leprechaun was pretty easy to make & the girls just loved it! I remember doing this project while in college with a fieldwork teacher. I'm sure it's not exactly like what we did at that time, but they turned out pretty cute!

Supplies- Paper Plate, Yellow/Green/Black Construction Paper, Orange Paint (Marker/Crayon), Paint Brush, Scissors, Glue, Google Eyes (opt.), Pom Pom Nose (opt.)
1. Use the green paper to cut out a large green top hat. I cut a square hat & a rounded hat.
2. Cut a small black belt to fit across the hat.
3. Cut a yellow square buckle.
(Again, I do a lot of the cutting because M1 & M2 are still pretty young. If you're crafting with bigger little ones you can always allow them to cut out the shapes as well. Start by drawing the shapes on the paper for them & allowing them to cut.)
4. Use orange paint to paint around the outside of the paper plate only, leaving the center (flat part) white.
(If you don't have paint, using an orange crayon/marker to color around the edge would work as well.)
5. Apply a generous amount of glue to the top of the plate.
6. Press the hat on top the glue.
7. Glue the black belt onto the hat.
8. Glue the yellow buckle on top of the belt.
9. Make the leprechaun face with whatever you've got.
We used google eyes, an orange pom pom for the nose & a small strip of black crinkled paper for the smile. The eyes & nose could be cut out of construction paper circles or you could simply draw all of the facial features as well. It's all about what supplies you've got!)
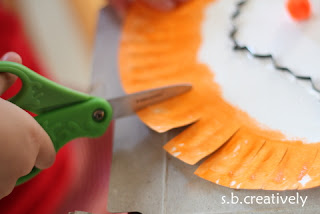
10. Once the orange paint is dry enough, cut small slits along the exterior of the plate, aka. the beard.
And there you have it, two sneaky leprechauns as M1 likes to call them.
Enjoy & Happy St. Patty's Day!
s.b.

3.14.2011

Paper Shamrocks

I feel like St. Patrick's Day snuck up on me this year. The weeks are just flying by & here we are half way through March! Here are our green paper heart SHAMROCKS!

Supplies - Green/White Construction Paper, Scissors, Glue, Green Decorations (sequence, buttons, glitter, tissue paper scraps, decorative paper scraps, etc.)
1. Cut out three large green hearts using the green construction paper.
2. Using the scraps, cut a long green rectangular stem as well.
3. Glue the hearts onto the white construction paper to form a shamrock shape.
4. Glue the stem on as well, pressing down lightly on each shape so it doesn't curl up.
4. Begin gluing down all the GREEN decorative pieces, scattering them all over the shamrock.

6. Allow time to dry & display!
(M1 chose to write the word SHAMROCK across hers once it was completely dry.
M2's is on the right.)
Enjoy! s.b.

4.08.2010

Finger Print Rainbow Mobile

(The following is a Guest Blog Post for Mom4Life. Be sure to head over & check out her great products!)
We are so excited that spring is officially here, but unfortunately so is the rain. We tried to make light of the gloomy weather this week by creating something a little more colorful, a rainbow! Even though we see & talk about them all the time, this is my daughter's first experience creating a rainbow. Great project, but can get a bit messy since we used finger prints to paint the rainbow. I planned on having her use her fingers to paint the clouds also, but plans changed & we used a brush instead.

~Supplies: *White construction paper, *Washable Paints, *Glue, *Scissors, *Crayons, *Paint brush, *Colored Ribbon
To Begin- 1. I started by cutting out a rainbow. Basically a half circle that I made even by tracing a large bowl I had in my kitchen. You can choose to do it free hand or use this one HERE. I also cut the clouds free hand. If this isn't for you, use the cloud template HERE.
2. Start by using a red crayon to draw a line along the outside edge that will be used as a guide for your child's finger prints. (The red line below her finger prints is visible in the picture below.)
3. When the red line is covered, go ahead & draw an orange line next & let your child start placing prints along the line.
4. Repeat with the colors yellow, green, blue & violet.
5. Once the colors are finished, cut out the unpainted "U" shape below the purple line to complete the rainbow.
6. Now for the clouds. You can let your child place blue prints all over the clouds to cover them OR you can allow them to paint the blue on with a brush like we chose to.

7. Allow time for the paint to dry & then you can tie the pieces together with string/ribbon to make your colorful mobile!
 
p.s. I'm working on a project that will utilize some of the left-over jelly beans... so don't throw them away just yet!!
Enjoy! s.b.

3.16.2010

Crazy St. Patty's Day Hat & Lunch...


We made it to the park today.... yes, it was 60 degrees & beautiful! But it looks like it's just a tease, by Sunday we're supposed to see snow again... sigh. Earlier today while enjoying our time outdoors at the park, we saw a boy with a green St. Patrick's Day hat on. It was one of those thin plastic ones that resembled a top hat. When M1 saw the hat she wanted it so badly.  I resolved the issue by telling her that when we got home we could make a St. Patricks Day hat of our very own. This is what we came up with. (Not our best work, but she was fairly excited about it.)

Supplies- *White & Green Construction Paper, *Glue, *Green Paper Scraps/Magazine Scraps, & Stickers (for decorating) *1 Green Pipe Cleaner (Not picutred), *Shamrock Cookie Cutter (for tracing), *Tape, *Scissors, Green Marker and/or Crayon

To Begin- 1. Fold the green paper in half (to create two shamrocks) & trace the cookie cutter. (Pic #2) Cut out the shamrock.
2. Cut the pipe cleaner in half & tape the ends to the back of each shamrock. (Pic #3) Set aside.
3. Using the white paper, cut out a long rectangle (About 3-4 inches wide). My paper was not long enough to fit around M1's head so I attached another piece to the end using tape to make it the right length.
4. Give your child a few minutes to decorate the long rectangle. (Pic #4) M1 chose to draw all over the paper first & then begin gluing on all of the green scraps we came up with. We had stickers, random green magazine clippings & some green foam hears that we made into a shamrock. Allow some drying time before moving on to step 5.
5. Using the tape, fasten the rectangle into a circle that fits on/around your child's head.
6. Tape the pipe cleaners onto the inside front of the hat & you're done! Enjoy.

And....Here is a quick glimpse of M1's green lunch from today. We pretty much started celebrating late this morning right after creating the festive hat. Seeing her excitement wearing the hat around, I decided to go ahead & make her a green lunch... complete with green milk, a shamrock sandwich (cut out using our cookie cutter), green pear & some edamame. We'll continue tomorrow morning with shamrock shaped pancakes & green milk again (It was a hit... so tomorrow morning I'll be able to make it a bit darker green. I held back this afternoon not knowing what she'd think of it.). We're also planning on making green rice krispy treats tomorrow to keep the celebration going. Sounds delicious!

Check back later this week for an early Earth Day Post...

3.15.2010

Sweet Shamrock Tortilla Chips


I found this little recipe on the Family Fun website. The recipe can be found HERE. We changed it a bit by using a shamrock cutter vs. the animal cutters. Way more festive! We also added cinnamon sugar to the chips instead of salt. These could be made year round using all kinds of cookie cutters!

The finished snack turned out great & it was such an easy, quick baking experience for M1. Very little mess, minus dumping cinnamon sugar everywhere! Both girls gobbled these up. They would be great dipped in vanilla yogurt. I wish I had thought of that earlier. We'll have to give it another try in a day or two with the remaining tortillas. Enjoy!

3.10.2010

Paper Plate Pot of Gold


M1 calls this her Pot of Gold Purse... I guess it does resemble a purse a bit. Lots of steps but a great finished product. Give it a try!

~Supplies: *Paper Plate, *Glue, *Scissors, *Stappler, *Black Paint, *Paint Brush *Cardboard (cereal box), *Yellow Construction Paper, *Glitter (optional), *Black Sting/Ribbon

To Begin - 1. Cut  the paper plate in half through the middle & staple together around the outside edge. (Picture #2)
2. Allow your child to paint both sides of the "pot" black using a small paint brush. I layed out some paper underneath, it was a bit messy!
3. While the paint is still wet, sprinkle glitter on the pot & allow to dry.
4. As the pot is drying, create the "gold" using the yellow construction paper & cardboard. (We used a Cheerios box since a large part of it was already yellow.) Cut out 1-2 inch circles around the box. Cover the  brown side of the coins with yellow construction paper. (Finished coins in Pic. #4) Another option would be  to paint the coins yellow. Either would be fine.
5. Tape/tie the ribbon to each corner of the pot & have fun carrying it around!

3.08.2010

Leprechaun Hat


St. Patricks Day is creeping up on us & I need to get the crafts going! Here we created a tiny leprechaun hat  for "Teddy." M1 thought it was so funny that Teddy had a leprechaun hat on his little head. In fact, Teddy has been sharing the hat with all the other animals/dolls in the house. They've all tried it on! Many more fun St. Patty's Day things to come... check back over the next week & a half.

~Supplies: *1 Toilet Paper Roll, *Green Tissue Paper (Check your Christmas bags/paper), *Green construction paper *Scissors, *Glue, *Small black strip of felt (You could use blk paper), *Small yellow foam square (Again, use what you have if you don't have foam) *Cardboard (We used a cereal box)

To Begin - 1. Cut the tissue paper into small 1-2 inch squares.
2. Begin by placing glue all over the roll & allowing your child to place the green squares all over the tube until it is covered & green. (Pic. #2) When she was done, I folded the edges that hung over inside the tube.
3. Glue the black strip around the bottom of the green tube & add the yellow "buckle" over the top. (Pic. #3)
4. Cut out a circle using the green construction paper. (Approx. 4in. diameter) This will be the base of the hat. Once you've got a good size circle, glue it to the cardboard, (Pic. #4) & cut it out.
5. Place a large amount of glue around the bottom of the toilet paper roll. (Right along the black belt near the bottom.) Place the "hat" onto the green base & allow at least an hour  for the glue to set.
6. Try the hat on all your family friends around the house! Enjoy. s.b.