Showing posts with label Animals. Show all posts

4.19.2011

Envelope Bunnies

Only a few short days until Easter arrives. After a week of baby shower planning (I hosted a shower yesterday.) we're back into Easter mode. This cute idea comes compliments of Martha Stewart and her fabulous website. M & M each made their own Envelope Bunny & they turned out oh, so cute!

Supplies- Glue, Envelope, Scissors, Pink/White/Black Construction Paper, Crayon/Marker, Small Pom Pom.
1. Seal the flap of the envelope. (Gotta love that big tongue!)
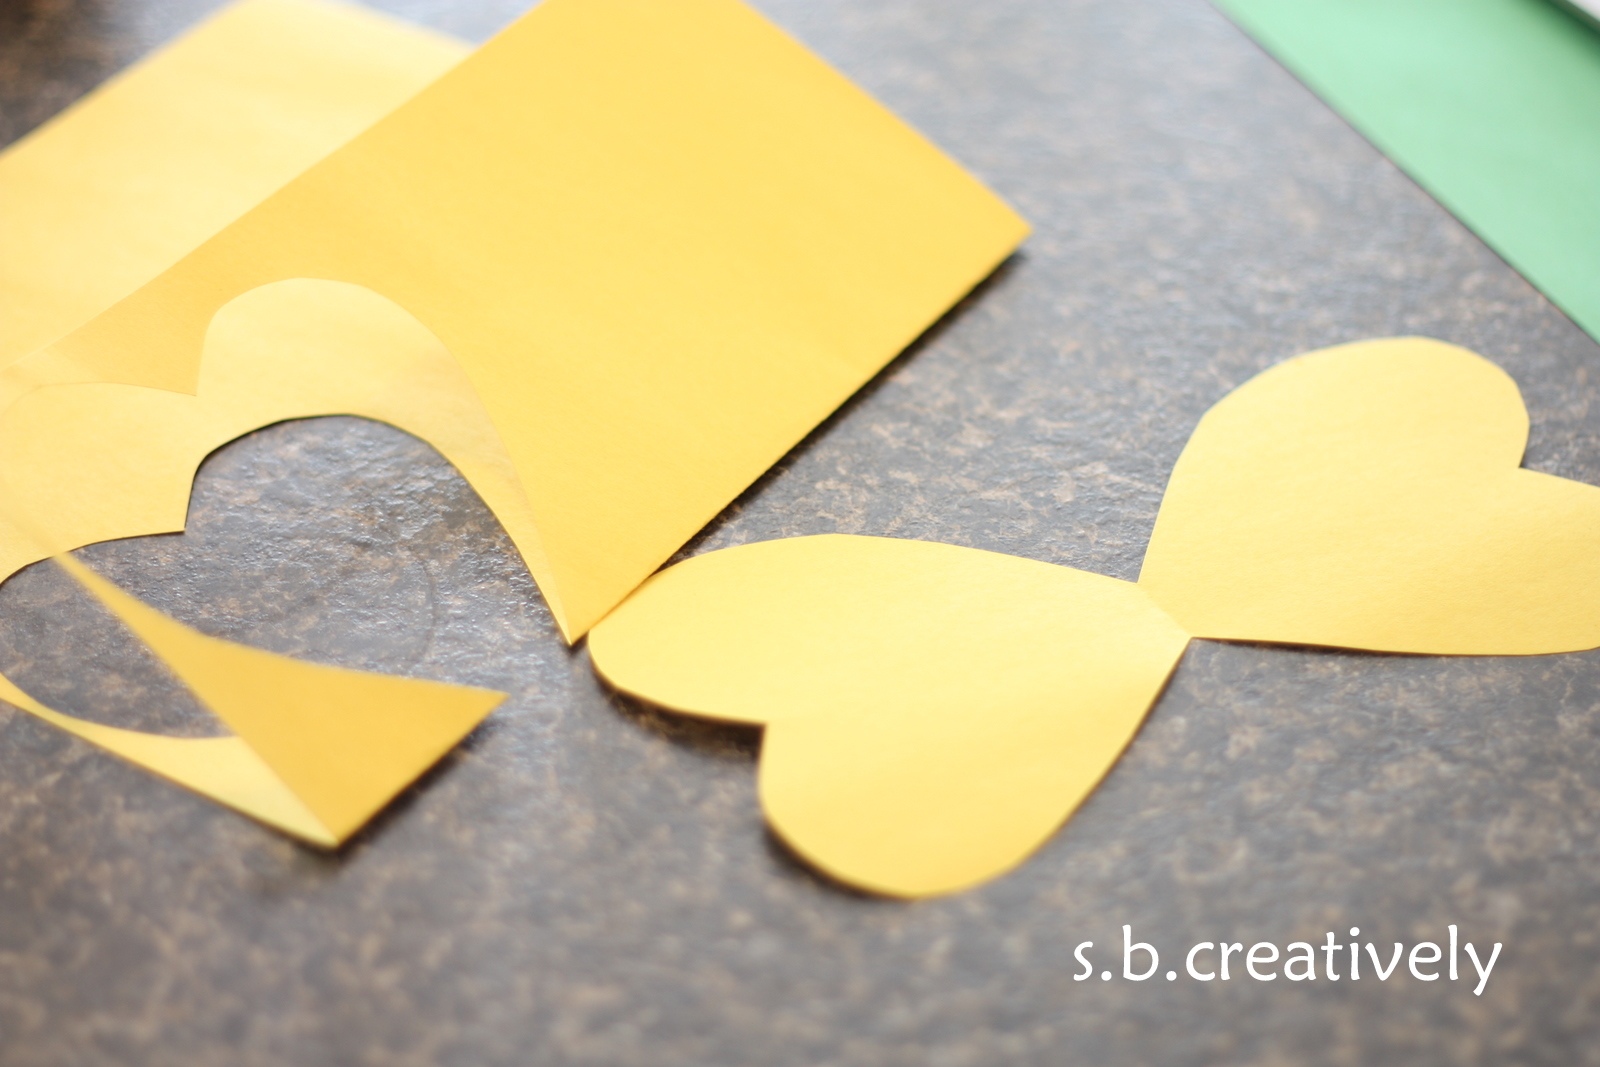
2. Draw bunny ears on the sealed side of the envelope, as shown below.
3. Cut out the bunny ears, following the lines drawn above.
4. Use an opposite color construction paper to cut out small ear shaped inserts for the middle of the ears. (For example, we used white inside ears for the pink bunny & pink insides for the white envelope bunny.)
5. Cut out two small black construction paper eyes for each bunny envelope you're doing.
6. Glue the construction paper ear middles onto the envelope ears...
Press down to secure....
7. Glue the black eyes into place.
8. Place a large dab of glue in place of the nose. Set the pom pom onto the glue & allow a few hours to dry.
9. Draw the bunny mouth under the pom pom nose using a crayon or marker. (We did manage to draw the mouth while the glue under the nose was still wet. You could wait to do this step until the nose is completely dry....might be a bit easier!)
10. Once the nose is completely dry fill the bunny pocket with the pretend Easter grass...
And treats of course!

I think these little envelope bunnies would make the cutest little classroom treats. A great alternative to baskets that I'm sure any little one would be delighted to receivce!
Enjoy! s.b.

4.06.2011

Yellow Easter Chick

Our 1st Easter craft this spring...Now if the weather would just warm up a bit so it would actually feel like spring! The girls were excited that this particular chick had moving arms!

Supplies- Yellow/Orange Construction Paper, Glue, Scissors, Tape, Google Eyes, Brass Fasteners, Yellow Feather.
1. Cut out a large egg shape for the body, a diamond shape for the beak & two small orange legs.
2. Trace two little hands on the yellow construction paper & cut out.
3. Use the brass fasteners to attach the hands to each side of the body for the wings (large oval).
*These fasteners were super cheap @ Michael's... if you don't have them handy, just glue the hands (wings) to the side of the chick. He'll still be just as cute w/o moving arms!)
(Closing the fasteners to complete the attachment)
4. Turn the chick over & glue on the eyes. (If you don't have google eyes, small construction paper circles can be used in their place.)
5. Fold the orange diamond shape in half to create a small beak. Glue it beneath the eyes.
6. Glue the legs onto the bottom of the chick.
7.. Use a small piece of scotch tape to fasten the feather to the top of the chick (on the backside).
And he's done! M1 & M2 enjoyed flapping the little wings by moving them up & down.
Enjoy! s.b.

2.03.2011

Valentine Love Bugs

This has always been one of our favorite books to read to the girls...
Love Bug by Sandra Magsamen. We could read it a hundred times a day, M1 & M2 love the very end when we tickle them like crazy. After reading it a few times this morning, we created our own little love bugs...or butterflies, but who's paying attention?!

Supplies- Glue, Colored Construction Paper, Scissors, (not pictured) Scotch Tape, Pipe Cleaners, Paint, Paint Brush, Toilet Paper Tube, Google Eyes (or a small circle of black paper for the eyes), Black Marker
 1. Paint the toilet paper tube the desired color.
(*If you don't have paint or don't feel like painting, have your little one wrap the tp tube with construction paper instead.)
2. While the tube dries a bit, cut out the love bug wings using a piece of construction paper.
Fold the paper in half & be sure that the bottom of the heart connects to the fold, as pictured below.
3. Glue the wings to the back of the tp tube. (We also placed a small piece of tape over the top to help hold the wings in place while they dried.)
4. Cut the pipe cleaner in half.
5. Tape a small colored paper heart to the end of each pipe cleaner.
6. Tape the empty end of each pipe cleaner to the inside top of the tp tube, as pictured below.
7. Glue the google eyes to the front of the love bug.
8. Add a smile using a black marker.
9. Decorate the wings with some more paper hearts, attaching them with glue.
And there you've got it... two cute little love bugs!
M2 made hers GREEN & GOLD in honor of the Packers...we're looking forward to the big game this weekend! Go Packers!!!
Enjoy! s.b.

1.04.2011

The Mitten Activity

I wanted to share a cute craft/activity that M1 brought home from school. I'm sure most of you have read The Mitten by Jan Brett. It's a favorite at our house along with Gingerbread Baby. I thought this was such a cute idea & M1 really enjoyed it. Her mitten has been played with for days. M2 enjoyed it as well, especially after reading the story many times.
Here is the story in case you haven't read or heard of it...
And here is her mitten.
At home I would cut out two mittens using colored construction paper & staple them together around the outside edge, leaving the opening to the mitten unstapled.
(They were able to get the image of the mitten on the construction paper using a copy machine. You my be able to put colored paper in your printer as well :)
 
Then simply use your computer to search for images to print out the animals of the story. (bear, raccoon, owl, fox, bunny, etc)
Cut them out & allow your little one to color them before placing them into their mitten.
 
Such a cute & easy craft that pairs well with a great book. Both of my girls are big into books so this was definitely a hit! M1 reads the story as M2 places the animals into the mitten.
It's snowing her today... we're crafting some fun winter stuff & drinking hot chocolate.
Enjoy! s.b.

11.21.2010

Toilet Paper Tube Turkey

We completed our first craft in our new house this weekend. Most of the supplies are unpacked but there is still a lot of organizing to do. Thankfully, this was an easy one that required minimal supplies. M1 is very excited to share her thankful turkey with the family this week!

Supplies- Toilet paper tube, glue, orange pipe cleaner, construction paper, scissors, black marker & scotch tape (not pictured).
1. Cut out a few feathers using the colored construction paper.
2. Using the brown paper, cut out a medium size circle for the turkey head. (Mine was about 3 inches in diameter)

3. Brainstorm with your child a handfull of things he/she is thankful for. M1 decided on Mom, Dad & M2...Books...New House & Her friends at school. She really did think hard about it too!
4. Cut 2- two inch pieces off the end of the pipe cleaner & then cut the remaining piece in half.
5. Wrap the small 2 inch pieces around the end of the longer pieces as shown below to create small "feet" for the turkey. Set aside.
6. Cut out two small white circles for the eyes (we used the marker to create small dots in the center of each eye.)
7. Using the orange, cut out a medium triangle for the beak & with the red paper a tear shaped gobbler as well.
8. Glue all of the pieces to the brown circle head.
 9. Use the tip of the scissors (parents) to create two small holes in the bottom 1/8 of the tp tube. (This is where the legs will eventually be poked through.)
 10. Use the glue to fasten the head to the top of the tp tube (Opposite the holes for the feet in the bottom.. be sure that the head is glued on the same side as the holes so the feet match up with the body!) & the feathers to the back of the tube. (We did use a little scotch tape to help keep the feathers in place... it worked much better than trying to get the glue to stick quickly.)
11. Slide the two pipe cleaner feet through the holes in the bottom of the tube. (They should stay in on their own w/o any glue or tape assistance.)
 And.... it's done! Lots of little steps but very fun for the little ones!
 What are your little ones thankful for?
Enjoy! s.b.

8.06.2010

Juice Bottle Bug House

If M1 wasn't so afraid of bugs this would be a great project.
I may have to craft it with her & give it a try because I think having bugs in a container to watch would be right up M2's alley. She's not nearly as girly as M1 is. My hope is that if the bugs are contained M1 won't freak out as much. It is ridiculous how much she hates bugs...definitely takes after her mom, the only difference is the bugs I'm terrified of are much bigger & much uglier (centipedes)!!  Fingers crossed... I have yet to see one here in our new town. Sounds like they aren't as big of an issue here... Hooray!
Here are the directions...Juice Bottle Bug House
I'll post pics once we actually make ours...Bugs aside, I think the girls will enjoy collecting all the bug "food" and sticks to create the bug home.
Have fun & enjoy! s.b.

7.08.2010

Wednesday's Library Art Project

This is a project that M1 started @ the library yesterday. Our library's story time always ends with a craft. Yesterday's story time was all about ducks, so they finished by creating a duck. M1 didn't finish her duck at the library because the paint wasn't dry, so we brought it home to finish. Super cute & very easy to create with a few at home supplies. Also very appropriate after seeing several ducks on the lake up north this past weekend.

Supplies: *Paper Plate, *Picture of a Duck (Printed from the Internet), *Yellow, Blue & Orange Paint, *Sponge, *Glue, *Scissors
1. Sponge paint the entire paper plate blue & allow to dry.
2. Sponge paint the duck yellow & allow to dry.
3. Optional (M1 chose not to do this step.) Sponge the duck's beak orange.
4. Once dry, cut out the duck.
5. Fold the paper plate in half.

6. Apply a large amt. of glue to the plate.
7. Press the duck onto the paper plate.
8. Allow some time to dry completely.
Done! A cute little duck swimming in the pond.
Enjoy! s.b.

6.23.2010

Paper Bowl Turtle

As many of you know, we recently went from city living to living with my parents (temporarily) in the country. It's a HUGE change for our family but the girls just love it. For the first time, they are able to run free & do a lot of exploring. Yesterday, we went for a long walk & passed by a small creek. While looking around at the water, we spotted a huge snapping turtle near the side of the road. M1 & M2 thought it was just sooo cool & wanted to do nothing but pick it up and play with it. Ummm.. NO! So we quickly took another look & went on our way. Later in the afternoon, I decided to help them make a turtle.
Supplies- *Green & Brown Paint, *Scissors, *2 Craft Sticks, *Paper Bowl, *Small Piece of Brown Paper/Cardboard, *Google Eyes, *Glue, *Opt.-Sequence & Green Tissue Paper
1. Paint the bowl green & the two craft sticks brown.
2. Decorate the "shell" however you wish. M1 really wanted to add sequence & then I also got out small tissue paper scraps for her to glue on for a little texture.
 
3. Use the brown paper to cut out a rounded head.
4. Glue on the google eyes.
5. Back to the craft sticks. Cut each of the brown craft sticks in half & glue them to the underside of the bowl for legs.
6. Glue the head into place.
7. Allow some time to dry & you're done. M1 & M2 have been playing with theirs all day. M2's is falling apart & missing a leg already but she doesn't care at all.
 
Enjoy! s.b.