9.28.2010

Homemade Candy Buttons

We can thank the October issue of Everyday w/ Rachael Ray for this fun one.... candy buttons! These were a big favorite of mine when I was little, so when I saw the recipe I knew they'd be a hit with M1 & M2 as well. My god-daughter was here also & she's a bit older so it was a lot of fun for her too. Exp. since she's actually eaten them before & knew exactly what they were. Super easy & the final product tastes JUST LIKE the originals.
Supplies- 1 1/2 cups confectioners sugar, 1 egg white, food coloring, Ziploc bags, Mixing bowl, Mixer, Scissors & A few sheets of white paper. (I used 8.5 x 11 Printer paper!)
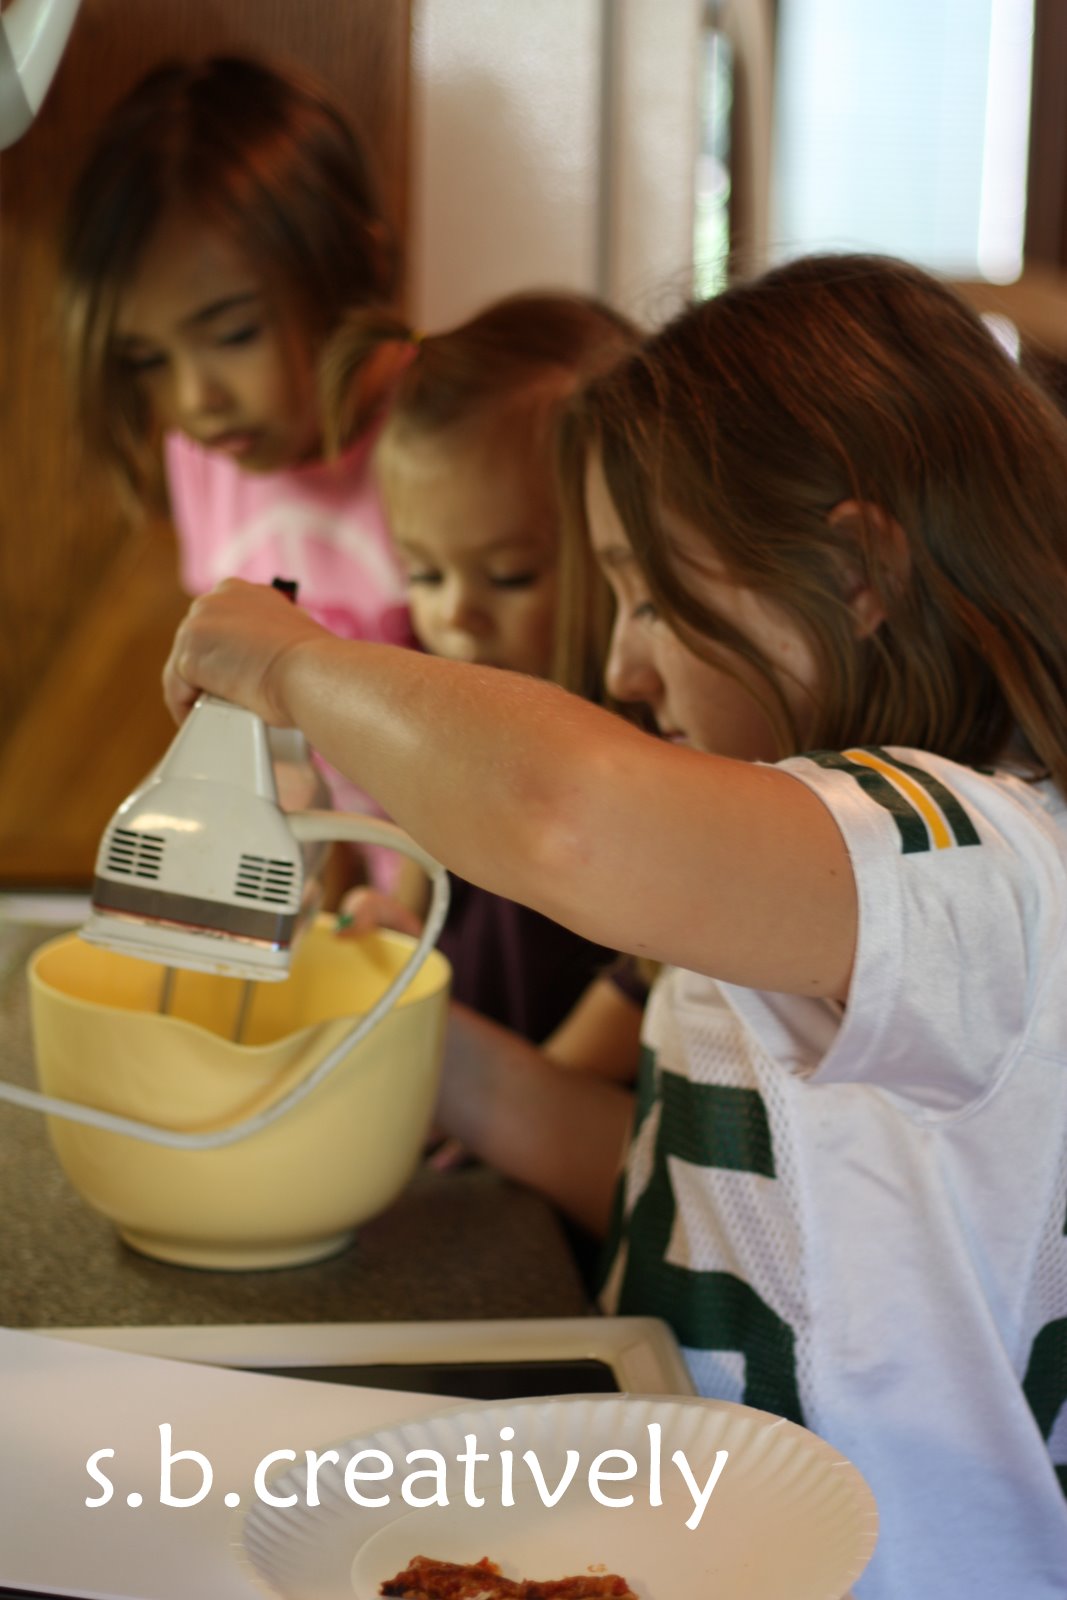
1. Mix together the sugar & egg white until mixture is thick & smooth. (A few minutes.)
2. Divide the sugar mixture into several different bowls. (Divide into as many
different colors you'd like to have.)
3. Add a few drops of food coloring into each bowl & mix well.
4. Spoon the different colored mixtures into individual Ziploc bags.
5. Cut about 12- 2 1/2" wide strips of paper & line them on a hard working surface.
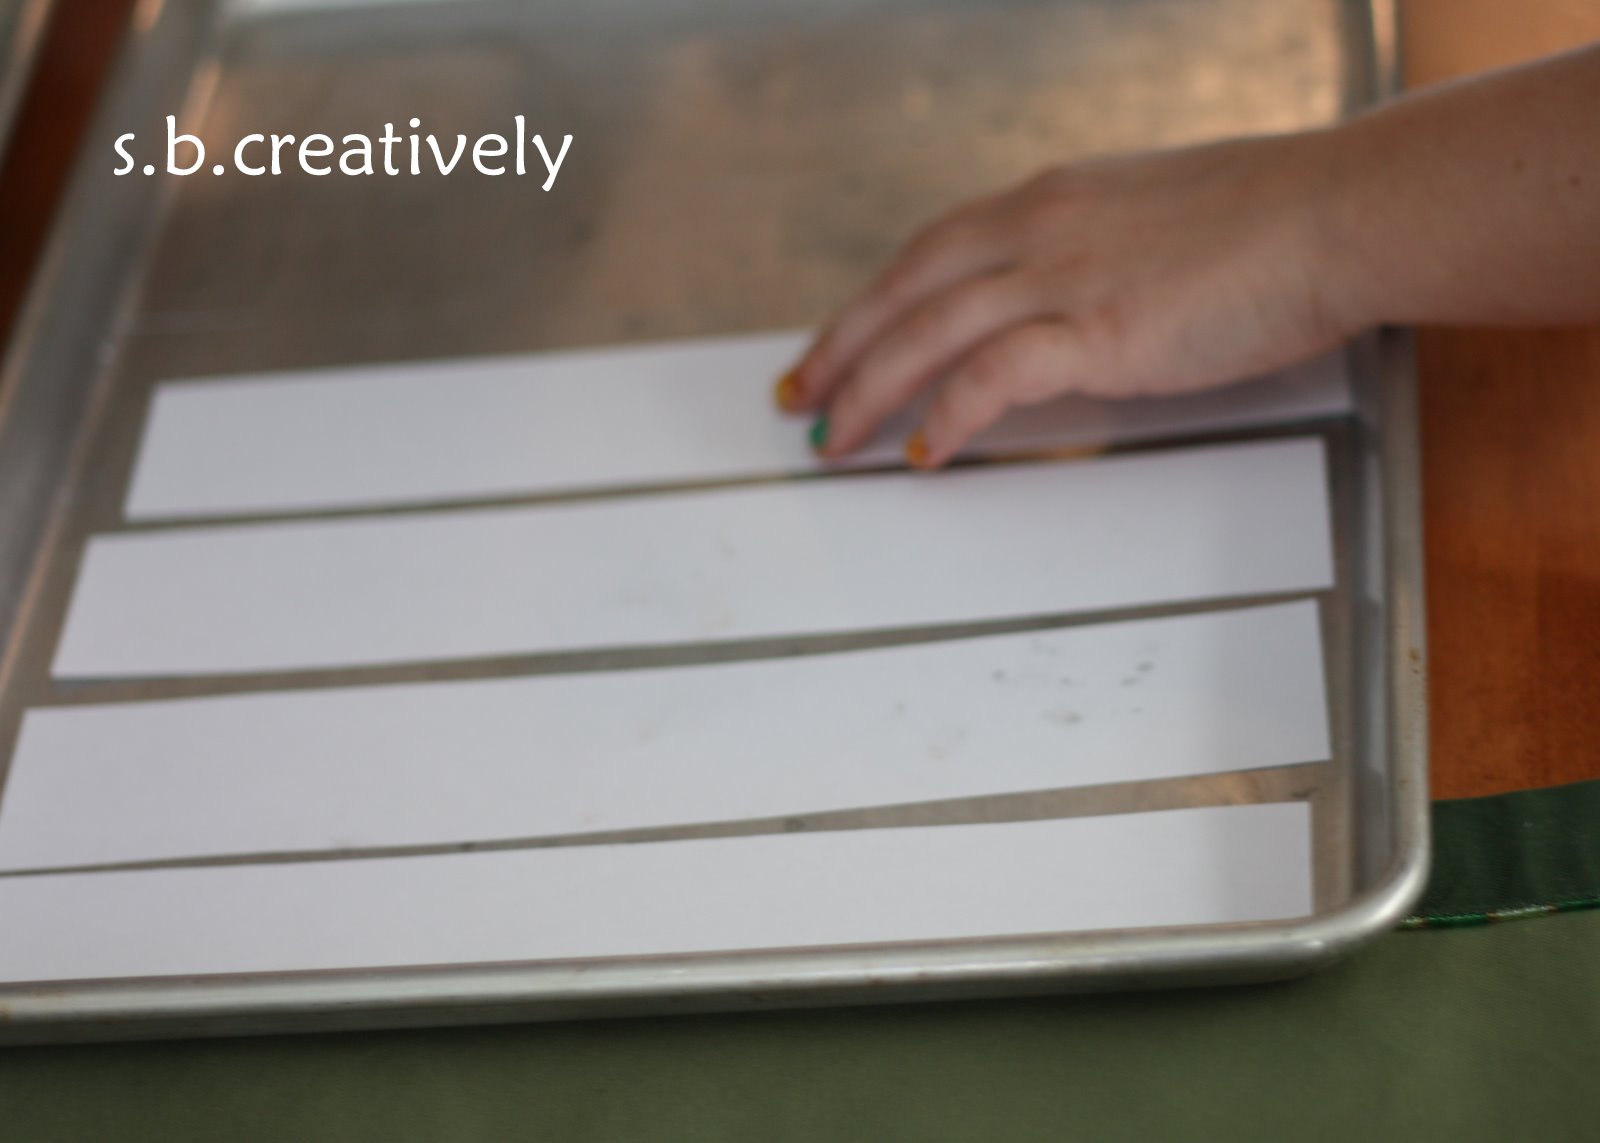
6. Cut the corner of one of the Ziplocs & begin to squeeze the sugar out onto the strips as shown below. (I made about 6 rows of a solid color & then moved on to the next color.)
7. Repeat with the remaining colors until the strips are full and/or the sugar mix is gone.
8. Allow the candy buttons to sit @ least 8 hours or overnight.
(We let them sit overnight & they turned out perfect. Again... EXACTLY like the originals. They even pop off w/o the paper stuck to them for the most part. We did have a few w/ a little paper that M1 wouldn't eat!)
Enjoy! s.b.

9.24.2010

Another Apple Creation...

No tutorial here... this is M1's apple wreath that she created at school. Sooo cute! I really enjoy the projects she does at home with me, but there's something about the crafts she does away from home. The seem so much more special! Maybe it's fact that she's so excited to show me & tell me exactly how she made it.
This particular project was stamped with real apples & then the bow was decorated with apple stickers. Another cute one that would be pretty easy to do with minimal materials.
Enjoy! s.b.

9.21.2010

M2's Apple Craft

We are LOVING the cooler temps & fall-like weather. It is my favorite time of the year. There are so many festive things to do together as a family as we approach Halloween & our new house being completed!!! This past weekend we decorated Grandma's house (our current home) with pumpkins & other fall decor. The girls are thrilled! We also made our first trip to the apple orchard to pick apples. Since then, we've been eating lots of apples... apple crisp, squash & apple bake, apple bread, etc. It's so fun. Today while M1 was at school M2 & I decided to continue with the apple fun & make one of her own.

Supplies: Red/White Construction Paper, 1 Small Paper Plate, Glue, Green or Brown Paint, Paint Brush & Scissors
1. Cut 1 inch squares of red paper... enough to cover the entire plate.
2. Cover the paper plate with glue.
3. Begin placing the red squares all over the plate until it's covered.
4. Paint your little one's hand green (as seen below). After I did this, I realized that an apple stem is actually brown. So if you want to be correct, use brown instead!
 
5. Stamp his/her hand onto the white piece of construction paper. Allow to dry.
6. Cut out the handprint & glue it to the top of the "apple."
Another creation from M2... I can't believe she is big enough to be crafting with me already. (She'll be 2 in January) Although we miss having M1 around Tues/Thurs. morning while she's at school... we also enjoy our time with just the two of us!
Enjoy! s.b.

9.14.2010

Craft for Moms...Decoupage Recipe Holder

I made this for my mom to replace an old recipe holder that she had sitting out in her house. I thought she could use something a little more pleasing to the eye! It's pretty easy to do... unfortunately, I did not take pictures as I was covering it but I still wanted to share...
I found the unfinished recipe box @ Michael's Arts & Crafts for pretty cheap. (I used a coupon of course!)
I got to work searching through Pottery Barn catalogs & many other magazines looking for fun scraps. I tried to stick with deep red & brown tones so it would match her decor.
Then I started to glue down all my scraps with Mod Podge until the entire box was covered. Finishing by coating the entire box with a polycrylic finish to "seal" it.
 
Since creating this one, I've made a few others. They definitely make cute gifts. I try to stay on the look-out for cute recipe cards to slip into them to complete the gifts. My mom has even made a few as gifts for her friends & my aunt crafted one for each of her children's teachers for Christmas presents. (An idea for M1's teacher too!)
Enjoy! s.b.

9.08.2010

We LOVE to Make Cards....

In our house we LOVE to make homemade cards for any occasion. While the girls do enjoy making the cards, they find way more excitement when they actually get to give them to someone. In fact, M1 didn't even want my grandma to take the card home that she made below. For some reason she felt attached to this one! It's a lot of fun & I think most of our recipients are overjoyed to have a card made by the girls.
Supplies - *Construction paper, Stickers, Glue, Markers, Pipe Cleaners, Scissors, etc. (Basically whatever you wish.)
1. I usually have my girls decorate the inside of the card first. It makes it easier to let whatever we decide to put on the front have time to dry in the end.
I write a personal message & they go to town with the markers, stickers, foam pieces & so on.
2. Once the inside is all done, you can go ahead & start decorating the front of the card.
For this particular "birthday" card, we decided to make a few flowers using pipe cleaners & pom poms. (As seen below) M1 LOVES to glue anything right now, so this was a perfect card for her to make.
3. Adding the pom poms & foam leaves.
 
4. Allow to dry. (I obviously took this before the drying time. I wanted to make sure I got a shot of it before it went home with Great Grandma!)
M2 getting creative making her birthday card...
Another one of our card creations... My little sister got engaged on Labor Day, so hung up the phone & got to work so we'd have a card for them by the time they got to our house to celebrate.
I did all the cutting & let M1 glue all the pieces of the cake & the ring together. She did a great job!
Just a quick sample of a few of our card creations....
Enjoy! s.b.
Make it Yours @ My Backyard Eden

9.02.2010

Candy Pencil Treats

How cute are these?
I'm thinking of making a few of these for M1 as a little "you did it" treat for next week when I pick her up from school. I found them in a google search & think they are so cute. She officially started 3 year old preschool today & did so well. No tears & she wants to go back... I would call it success!
Below- All dressed & ready to go...
Below is another google image that I found. Just a sligtly different variation from the first one & a bit easier. A Hershey Kiss, I'm assuming a roll of Life Savers wraped with yellow paper, a Rolo & a red Life Saver. So easy & so cute!
I wish I had seen this while I was teaching, it would have been a great first day of school gift for my students as well! Hopefully all your little ones had a great first week of school (if they've started) or good luck to those who start next week!
Enjoy! s.b.