
Two of the cutest little red-bearded men I've ever seen! This Leprechaun was pretty easy to make & the girls just loved it! I remember doing this project while in college with a fieldwork teacher. I'm sure it's not exactly like what we did at that time, but they turned out pretty cute!
Supplies- Paper Plate, Yellow/Green/Black Construction Paper, Orange Paint (Marker/Crayon), Paint Brush, Scissors, Glue, Google Eyes (opt.), Pom Pom Nose (opt.)

1. Use the green paper to cut out a large green top hat. I cut a square hat & a rounded hat.
2. Cut a small black belt to fit across the hat.
3. Cut a yellow square buckle.
(Again, I do a lot of the cutting because M1 & M2 are still pretty young. If you're crafting with bigger little ones you can always allow them to cut out the shapes as well. Start by drawing the shapes on the paper for them & allowing them to cut.)

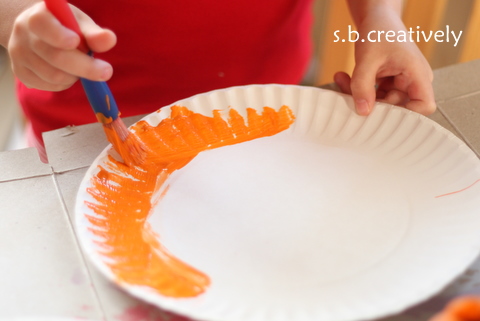
4. Use orange paint to paint around the outside of the paper plate only, leaving the center (flat part) white.
(If you don't have paint, using an orange crayon/marker to color around the edge would work as well.)
5. Apply a generous amount of glue to the top of the plate.

6. Press the hat on top the glue.

7. Glue the black belt onto the hat.

8. Glue the yellow buckle on top of the belt.

9. Make the leprechaun face with whatever you've got.
We used google eyes, an orange pom pom for the nose & a small strip of black crinkled paper for the smile. The eyes & nose could be cut out of construction paper circles or you could simply draw all of the facial features as well. It's all about what supplies you've got!)

10. Once the orange paint is dry enough, cut small slits along the exterior of the plate, aka. the beard.

And there you have it, two sneaky leprechauns as M1 likes to call them.

Enjoy & Happy St. Patty's Day!
s.b.


No comments:
Post a Comment